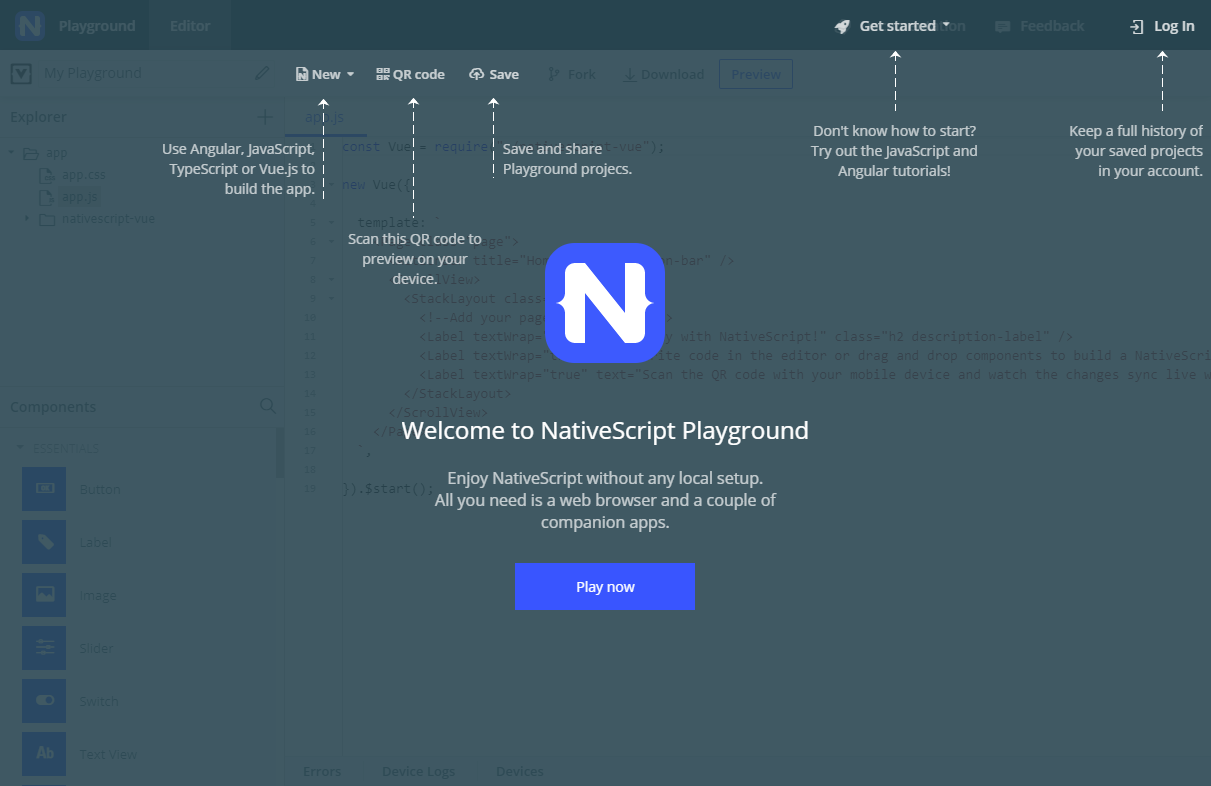
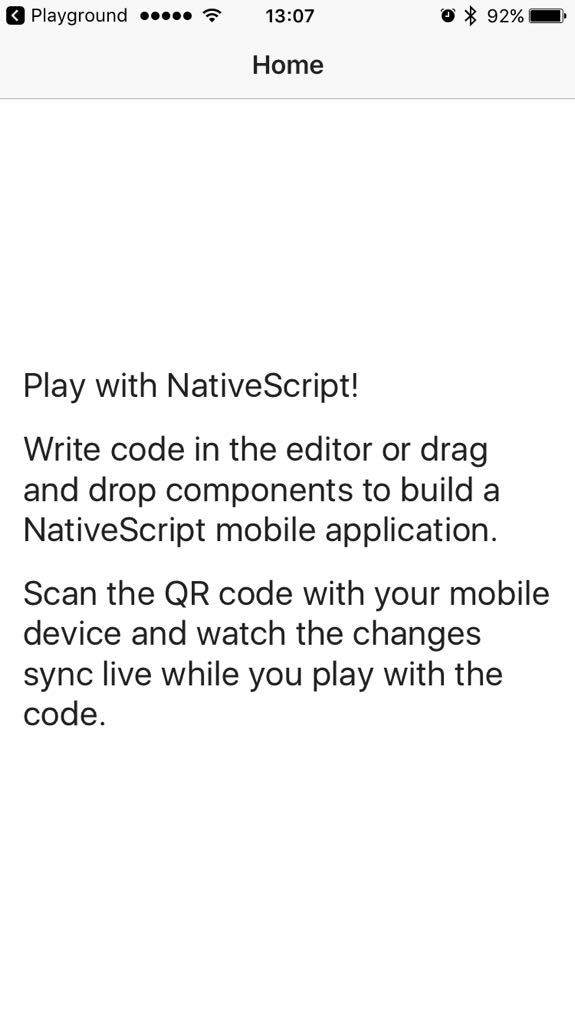
NativeScript Playground (opens new window) 在云中,在这里您可以随意使用NativeScript和Vue。从你的浏览器,直到你找出基本。启动该链接并开始在位置周围拖放组件代码。
您可以在游乐场工作,只要您愿意。您可以使用它来体验NativeScript开发或开发整个项目。但是,当您准备好将应用程序放在那里时,您需要跳上更高级的旅行车并 在本地安装NativeScript工具 ,然后 选择一个模板开始。
该页面由两部分组成:
# 第1部分:熟悉游乐场
点击 此链接 (opens new window) 可以访问云中的简单代码编辑器,其中为您预先加载了一个非常基本的NativeScript + Vue.js模板。
提示: 前往 游乐场的示例任务 ,了解如何在游乐场开始使用。
# 在你开始之前
如果这是您第一次来这里,Playground会提示您安装几个移动应用程序 - NativeScript Playground和NativeScript Preview。它们一起让您看到您的代码更改在设备上实时应用。无需代码构建和捆绑。
你可以忽略这一步但如果没有它,你将会错过玩Vue.js和NativeScript的大部分乐趣和兴奋。
在尝试代码时保持应用程序正常运行。
# The lay of the land
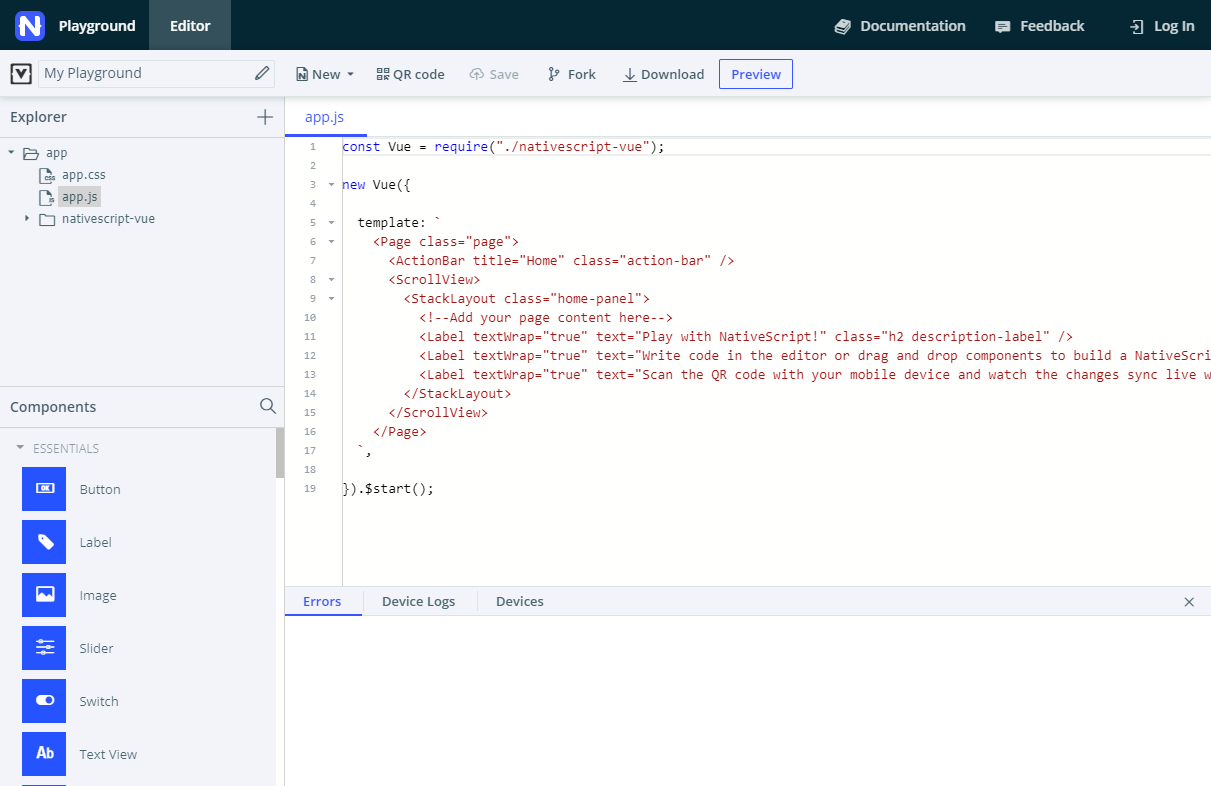
左侧边栏提供文件资源管理器和 组件 面板。您在应用上的大部分工作都将在 components > HelloWorld.vue 中进行, 您将在其中创建用户界面及其背后的业务逻辑。暂时不需要深入研究任何其他文件。
该 组件 面板可快速访问已预配置的所有可用NativeScript UI组件的代码。
从页面顶部,您可以将更改推送到设备上的预览应用,保存并下载代码。
页面底部是您最好的朋友,提供实时错误报告和设备日志。
# 拖放到代码
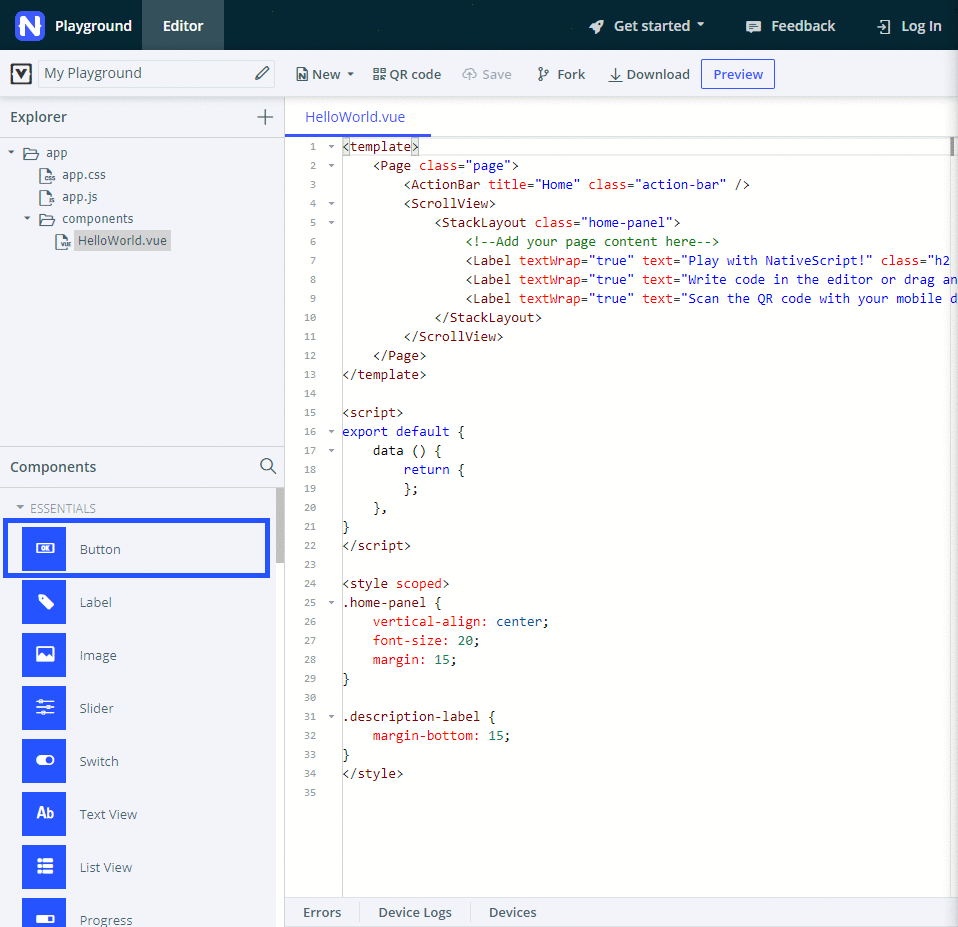
只需从 组件 面板中单击一个组件并将其拖动到代码编辑器中, 该编辑器位于 <template> 中的 components > HelloWorld.vue。 释放鼠标按钮会为相应的组件插入一些预先编写的示例代码。与它配套的任何方法(例如按钮或项目点击上发生的事情)都会自动添加到下面的<script> 块中。
提示: 使用 组件 面板的搜索可以快速找到要使用的元素。搜索仅适用于组件的标题,而不适用于代码中使用的实际名称。 例如:搜索找到的 文本字段 但是没有找到 文本框.
要使大多数UI组件起作用,您需要将它们放在 <Page> 块内, 最好放在布局组件中。布局告诉您的应用如何在屏幕上定位UI组件。
注意: 现在,没有什么能阻止您将代码放在会导致应用崩溃或根本不加载的地方。在这些情况下,请查看 错误 和 设备日志 选项卡以获取更多信息。
# 实时查看

将代码放入有效位置后,点击 预览 (或 Ctrl+S 或 Cmd+S) ),即可在设备屏幕上看到您的应用刷新。
在某些情况下,当您与应用程序进行交互时,它会意外关闭。再次启动它并检查崩溃报告。
如果您在任何时候停止在设备上看到更改,请单击 QR 码 并使用 Playground 应用程序重新扫描QR码。
# 配置您的代码
因此,组件运行并显示在屏幕上。你很兴奋,但你想把它变成你自己的。躲开Playground建议的默认代码。修复尺寸和标签,删除或添加元素。
向下滚动到该 <style scoped> 块并稍微调整样式。尝试颜色和字体大小。
# 第2部分:构建应用程序
如果要浏览 NativeScript Playground (opens new window),可以从创建一个具有以下要求的简单待办事项应用程序开始:
- 基本设计
- 双标签布局
- 一个选项卡显示活动任务,并允许您添加新任务
- 第二个选项卡列出完成的任
- 基本功能
- 添加任务:用户可以将任务添加为文本
- 查看任务:新添加的任务列为活动状态,可以点击
- 完成任务:点击活动任务会显示带有选项的操作对话框
- 删除任务:点击活动或已完成的任务会显示带有选项的操作对话框
- 先进的设计
- 用于添加任务的输入和按钮被设置样式
- 标签有样式
- 活动任务的样式
- 已完成的任务具有样式
提示: 本教程的所有部分都包含 一些 NativeScript 基础知识 和 需求实现 子部分。 您可以跳过基础知识子部分并直接跳转到实现,以获得更实际的方法。
# 裸Vue.js模板
本教程的所有开发都在 components > HelloWorld.vue 中进行,包含前端,代码隐藏逻辑和大多数样式。
HelloWorld.vue 从一个 <template> 由几个标签组成的简单块开始, 没有连接的代码隐藏逻辑。当您将用户界面组件拖放到应用程序时,Playground会填充该 <script> 块。
您将在 <template> 块中设计用户界面或在 <script> 块中构建应用程序功能。该 <template> 块需要与NativeScript兼容的XML。该 <script> 块接受Vue.js和NativeScript JavaScript代码。
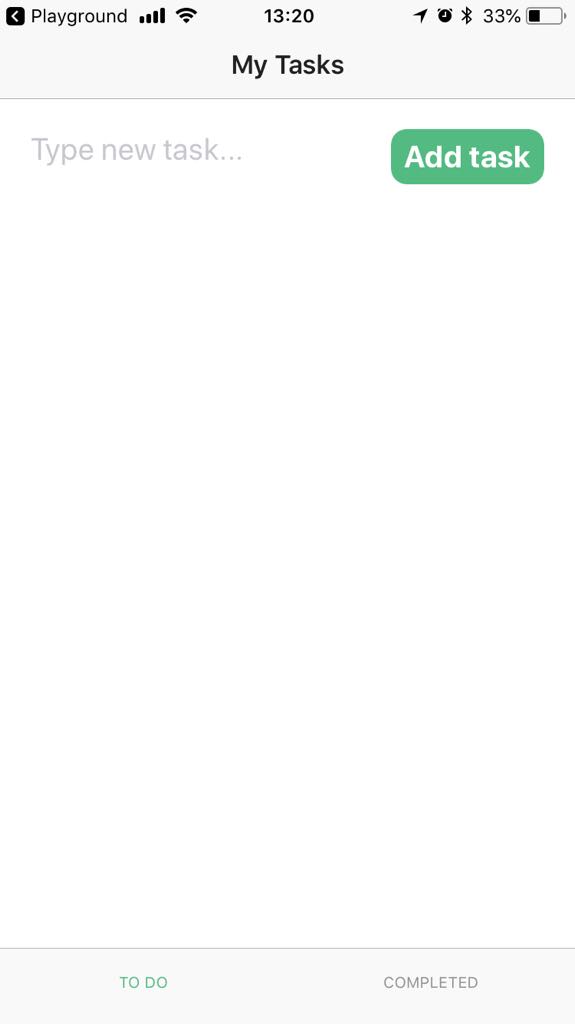
# 基本设计
# 科进展
以下是您的应用在本节开头和结尾处的显示方式。
| 初始屏幕 | 标签1 | 标签2 |
|---|---|---|
 | 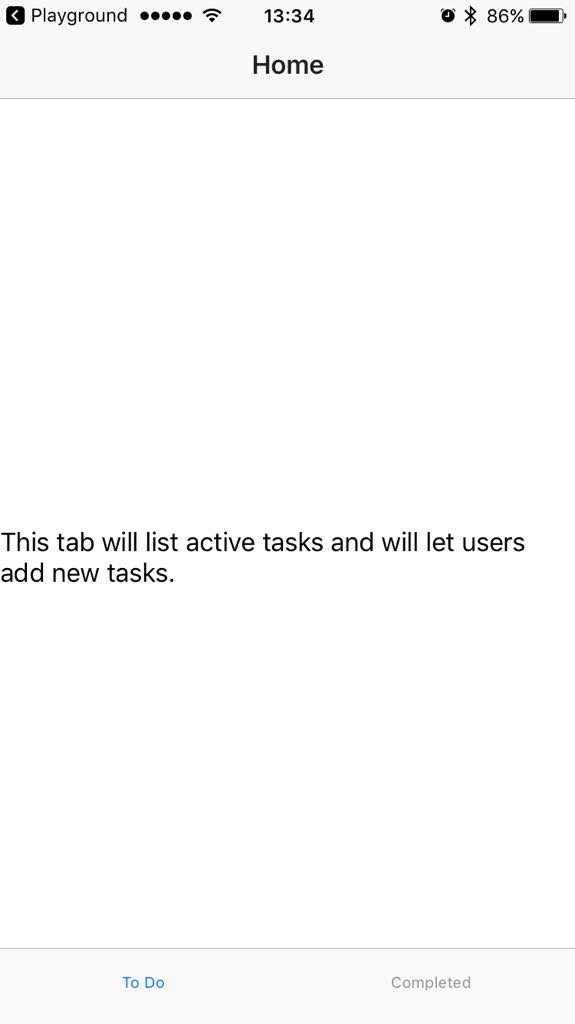 | 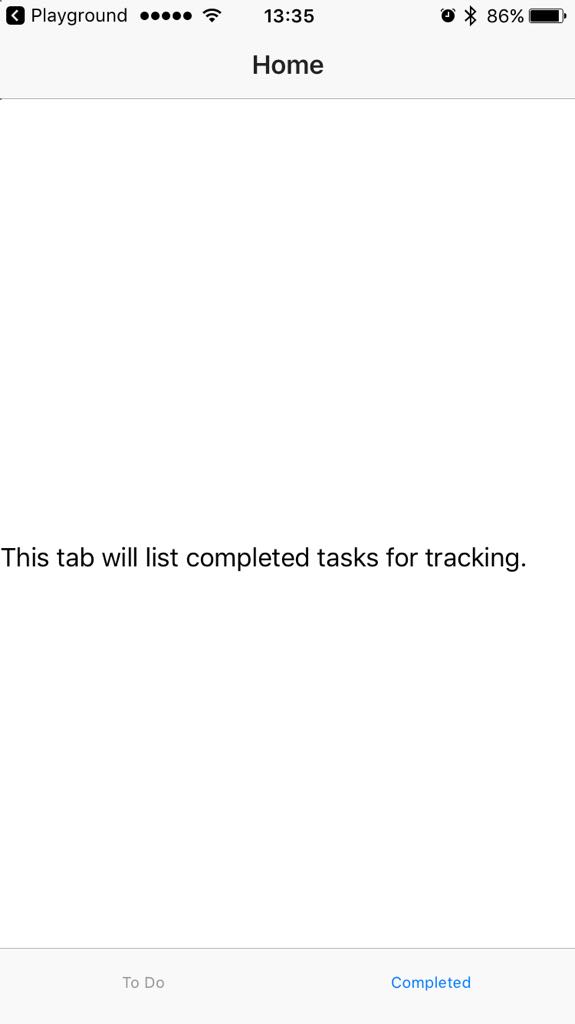 |
# 一些NativeScript基础知识
<Page> 元素是每个NativeScript-Vue应用程序的顶级用户界面元素。所有其他用户界面元素都嵌套在其中。
<ActionBar> 元素显示了一个操作栏 <Page>。A <Page> 不能包含多个 <ActionBar>。
通常,在 <ActionBar> 之后,您将拥有导航组件(例如抽屉或选项卡视图)或布局组件。这些元素控制应用程序的布局,并让您确定如何在其中放置其他用户界面元素。
# 要求实施
使用该 <TabView> 组件创建双标签应用程序。
- 更改标题
<ActionBar>以反映应用目的。 - 删除
<ScrollView>模板附带的默认块及其所有内容。<ScrollView>组件是可滚动内容的顶级布局容器。 - 将
<TabView>组件拖放到其位置。
Playground应用了一些代码格式,包括处理缩进。但是,在插入后应用格式,并且使用浏览器的撤消功能仅恢复格式而不是代码的插入。 - 配置
<TabView>填充屏幕的高度(将其设置为100%)。 - 更改
<TabViewItem>元素的标题及其内容以反映其目的。
此时,选项卡的文本内容显示在<Label>没有样式和格式的组件中。将textWrap="true"属性应用于相应的<Label>组件以改进文本的可视化。
在此阶段结束时,您 <HelloWorld.vue> 应该类似于此示例:
<template>
  <Page class="page">
    <ActionBar title="My Tasks" class="action-bar" />
    <TabView height="100%">
      <TabViewItem title="To Do">
        <Label text="This tab will list active tasks and will let users add new tasks." textWrap="true" />
      </TabViewItem>
      <TabViewItem title="Completed">
        <Label text="This tab will list completed tasks for tracking." textWrap="true" />
      </TabViewItem>
    </TabView>
  </Page>
</template>
<script>
export default {
  data () {
    return {
    };
  },
}
</script>
<style scoped>
.home-panel {
  vertical-align: center;
  font-size: 20;
  margin: 15;
}
.description-label {
  margin-bottom: 15;
}
</style>
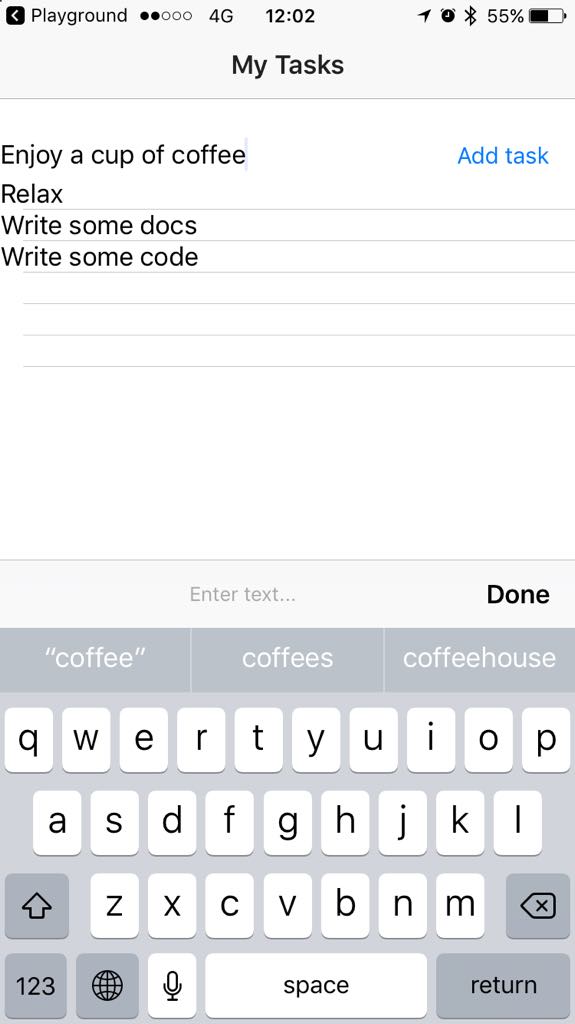
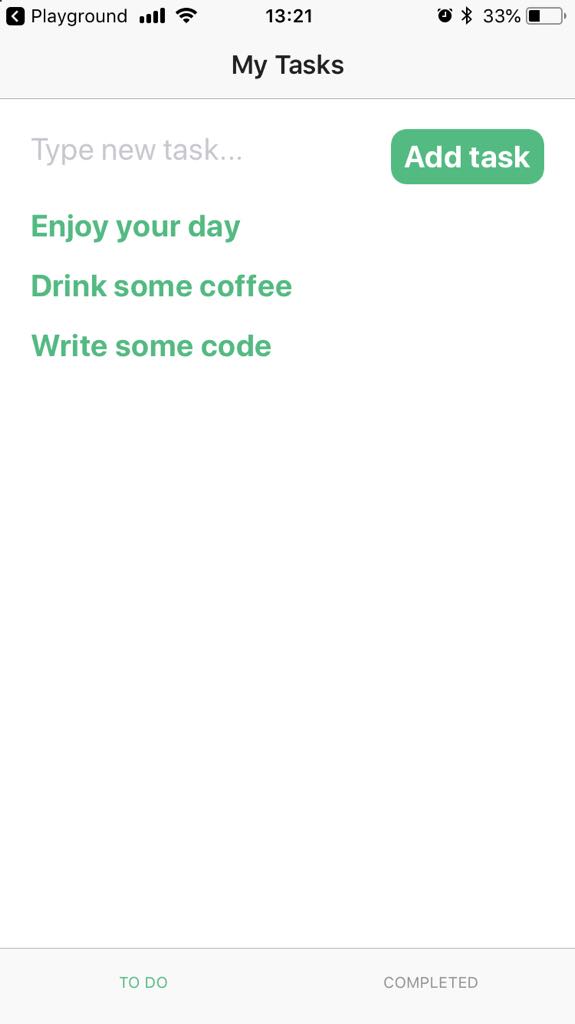
# 基本功能:添加任务
# 科进展
以下是您的应用在本节开头和结尾处的显示方式。
| 初始屏幕 | 标签1 - 没有任务 | 标签1 - 添加了任务 |
|---|---|---|
| 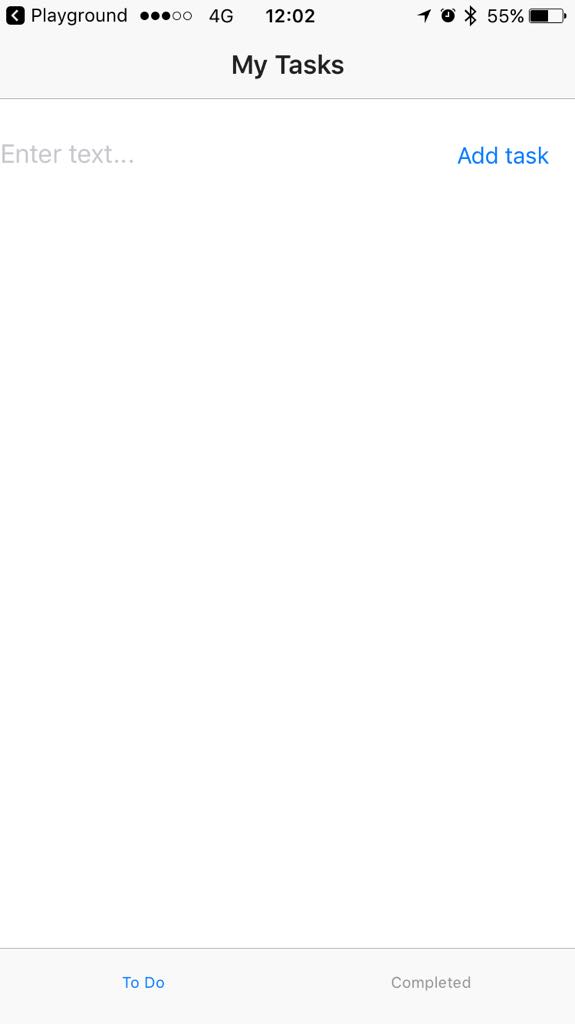 |  |
# 一些NativeScript基础知识
布局组件允许您安排应用程序的各种UI小部件。每当您需要在应用程序屏幕上放置多个UI小部件时,您可能会使用其中一个可用的布局选项。 <StackLayout> 和 <GridLayout> 是基本但通用的选项,可以分别将元素垂直放置或放置在类似表格的布局中。虽然
<StackLayout> 以其自然顺序显示元素,但是 <GridLayout> 允许您选择网格中元素的确切位置。
# 要求实施
使用 <GridLayout> 来排列页面上的 一个 <TextField> 和一个 <Button> 。 后两者构成了应用程序的输入功能。
使用 <ListView> 显示输入字段下方的任务。
- 为第一个选项卡从第一个
<TabViewItem>块中删除<Label>组件。 - 在
<StackLayout>块中为第一个选项卡拖放<TabViewItem>组件。
默认代码创建一个彩色的垂直堆栈。 - 从
<StackLayout>块中删除所有<Label>组件。 - 在
<StackLayout>块中为第一个选项卡拖放一个<GridLayout>组件。
默认代码创建一个彩色表,显示如何定位元素和合并网格单元格。 - 从
<GridLayout>块中删除所有<Label>组件。 - 配置
<StackLayout>。- 删除背景颜色。
- 设置宽度和高度。
- 配置
<GridLayout>。- 将网格设置为由两列和一行组成。
- 将网格的宽度设置为100%,以便占据屏幕的整个宽度。
- 将网格的高度设置为25%。否则,
<ListView>您稍后添加的内容可能会重叠<GridLayout>。 - 删除网格的任何其他设置。
- 在
<GridLayout>块中拖放<TextField>and a<Button>。
Playground 首次将JavaScript代码添加到您的代码中。注意下面<script>块中添加的data()和methods块。 在下一个实现步骤中,您需要向这些部分添加代码来创建一些应用程序功能。 - 在网格下方拖放
<ListView>。
默认代码在<FlexboxLayout>中创建国家和国家标志图标列表。 - 配置网格中元素的位置。
- 将
<TextField>设置为位于第一列和第一行。 - 将
<Button>设置为位于第二列和第一行。
- 将
- 配置
<TextField>。- 使文本字段可编辑。
- 使用键盘
Return来启用添加任务。
- 清理并配置
<ListView>。- 除去
<Label>之外的所有嵌套块。 - 将其高度设置为75%。否则,
<ListView>可能与<GridLayout>重叠。 - 使用
countries绑定到活动任务数组替换相关绑定。 - 在
<script>块中,删除国家/地区阵列并为活动任务创建一个空数组。
- 除去
- 在
<scripts>块中,将一些逻辑绑定到按钮的点击。- 在控制台中记录新添加的任务。
- 将新添加的任务添加到活动任务数组中。使用
unshift将新项目放置在页面顶部 - 输入后清除文本字段。
- 使用
<Label>中的<ListView>在屏幕上列出新添加的任务。
在此阶段结束时,您 <HelloWorld.vue> 应该类似于此示例:
<template>
  <Page class="page">
    <ActionBar title="My Tasks" class="action-bar" />
    <TabView height="100%">
      <TabViewItem title="To Do">
        <!-- Positions an input field, a button, and the list of tasks in a vertical stack. -->
        <StackLayout orientation="vertical" width="100%" height="100%">
          <GridLayout columns="2*,*" rows="*" width="100%" height="25%">
            <!-- Configures the text field and ensures that pressing Return on the keyboard produces the same result as tapping the button. -->
            <TextField col="0" row="0" v-model="textFieldValue" hint="Type new task..." editable="true" @returnPress="onButtonTap" />
            <Button col="1" row="0" text="Add task" @tap="onButtonTap" />
          </GridLayout>
          <ListView class="list-group" for="todo in todos" @itemTap="onItemTap" style="height:75%">
            <v-template>
              <Label :text="todo.name" class="list-group-item-heading" />
            </v-template>
          </ListView>
        </StackLayout>
      </TabViewItem>
      <TabViewItem title="Completed">
        <Label text="This tab will list completed tasks for tracking." textWrap="true" />
      </TabViewItem>
    </TabView>
  </Page>
</template>
<script>
export default {
  methods: {
    onItemTap: function(args) {
      console.log('Item with index: ' + args.index + ' tapped');
    },
    onButtonTap() {
      console.log("New task added: " + this.textFieldValue + "."); // Logs the newly added task in the console for debugging.
      this.todos.unshift({ name: this.textFieldValue }); // Adds tasks in the ToDo array. Newly added tasks are immediately shown on the screen.
      this.textFieldValue = ""; // Clears the text field so that users can start adding new tasks immediately.
    },
  },
  data() {
    return {
      todos: [],
      textFieldValue: "",
    };
  },
}
</script>
<style scoped>
.home-panel {
  vertical-align: center;
  font-size: 20;
  margin: 15;
}
.description-label {
  margin-bottom: 15;
}
</style>
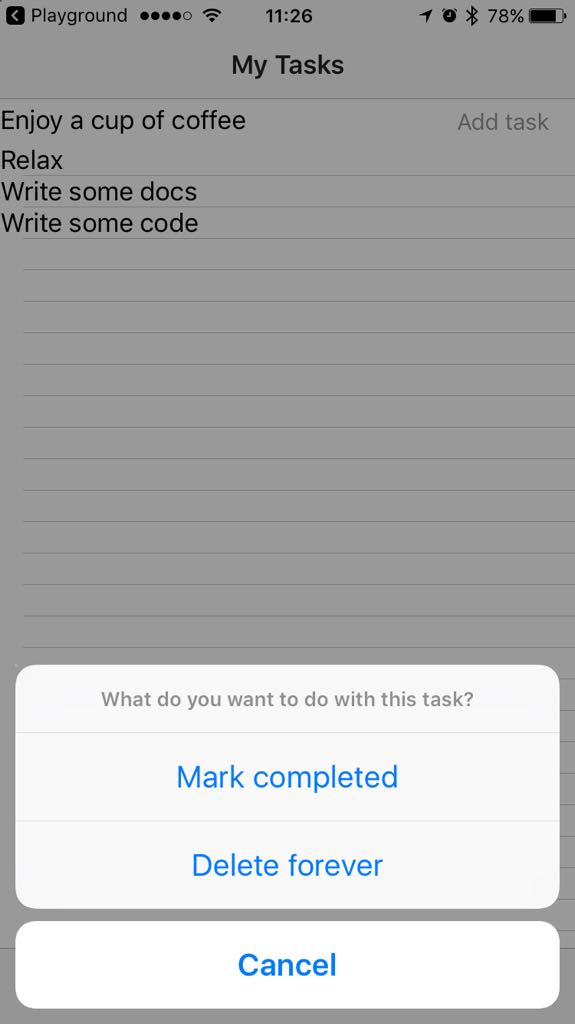
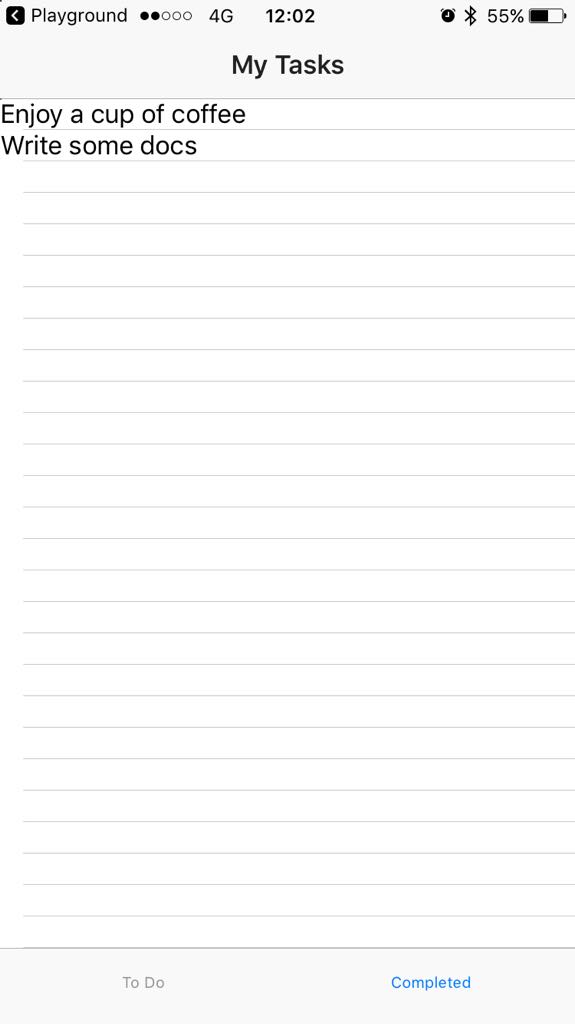
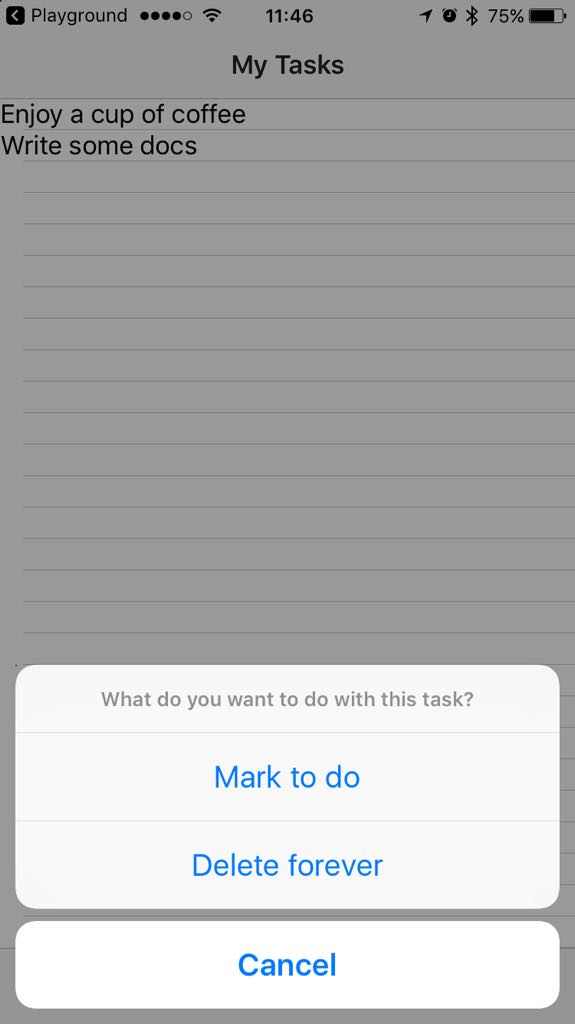
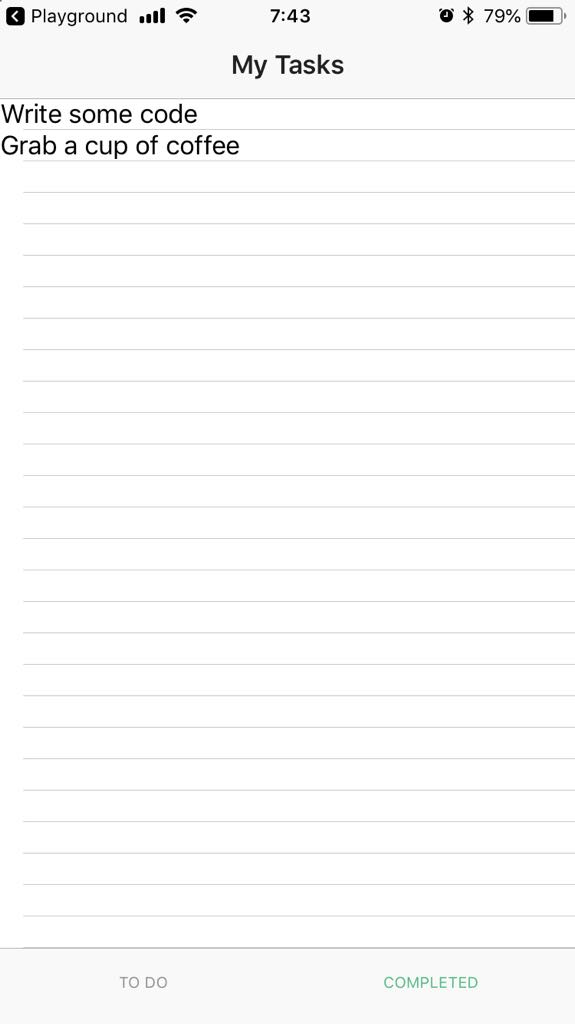
# 基本功能:从待办事项选项卡查看,完成和删除任务
# 科进展
以下是您的应用在本节开头和结尾处的显示方式。
| 标签1 - 添加了任务 | 标签1 - 项目点击 | 标签2 - 已完成的任务 |
|---|---|---|
|  |  |
# 一些NativeScript基础知识
开箱即用时, <ListView> 组件会检测每个项目的点击手势并为其发出事件。该事件包含有关tapped数组项的索引和数组项本身的信息。要让用户选择点按手势的结果并展开应用的功能,您可以将对话框与事件相关联。
dialogs (opens new window) 是一个全球可用的模块,为应用程序提供多种可配置的对话框类型:警报,操作,提示,登录,确认。此实现依赖于 action() 让用户选择是将任务标记为已完成还是将其从活动任务列表中删除。
# 要求实施
- 在第二个
<TabViewItem>块中,删除<Label>元素。拖放<ListView>元素,清理其内容并为其设置高度。 - 在新添加的
<ListView>元素中显示已完成任务数组(dones)的项目。
<ListView class="list-group" for="done in dones" @itemTap="onDoneTap" style="height:75%">
  <v-template>
    <Label :text="done.name" class="list-group-item-heading" />
  </v-template>
</ListView>
- 修改
onItemTap方法。
- 方法显示一个
action()对话框。 - 方法在控制台中记录用户选择以进行调试。
- 根据用户选择,该方法将元素从
todos数组移动到dones数组,从数组中删除元素todos,或者取消对话框。使用splice()避免留下阵列中的孔,并unshift()确保最近完成的任务显示在顶部。
onItemTap: function(args) {
  action('What do you want to do with this task?', 'Cancel', ['Mark completed', 'Delete forever'])
    .then(result => {
      console.log(result); // Logs the selected option for debugging.
      switch (result) {
        case 'Mark completed':
          this.dones.unshift(args.item); // Places the tapped active task at the top of the completed tasks.
          this.todos.splice(args.index, 1); // Removes the tapped active  task.
          break;
        case 'Delete forever':
          this.todos.splice(args.index, 1); // Removes the tapped active task.
          break;
        case 'Cancel' || undefined: // Dismisses the dialog
          break;
      }
    })
},
在此阶段结束时,您 <HelloWorld.vue> 应该类似于此示例:
<template>
  <Page class="page">
    <ActionBar title="My Tasks" class="action-bar" />
    <TabView height="100%">
      <TabViewItem title="To Do">
        <!-- Positions an input field, a button, and the list of tasks in a vertical stack. -->
        <StackLayout orientation="vertical" width="100%" height="100%">
          <GridLayout columns="2*,*" rows="*" width="100%" height="25%">
            <!-- Configures the text field and ensures that pressing Return on the keyboard produces the same result as tapping the button. -->
            <TextField col="0" row="0" v-model="textFieldValue" hint="Type new task..." editable="true" @returnPress="onButtonTap" />
            <Button col="1" row="0" text="Add task" @tap="onButtonTap" />
          </GridLayout>
          <ListView class="list-group" for="todo in todos" @itemTap="onItemTap" style="height:75%">
            <v-template>
              <Label :text="todo.name" class="list-group-item-heading" />
            </v-template>
          </ListView>
        </StackLayout>
      </TabViewItem>
      <TabViewItem title="Completed">
        <ListView class="list-group" for="done in dones" @itemTap="onItemTap" style="height:75%">
          <v-template>
            <Label :text="done.name" class="list-group-item-heading" />
          </v-template>
        </ListView>
      </TabViewItem>
    </TabView>
  </Page>
</template>
<script>
export default {
  methods: {
    onItemTap: function(args) {
      action('What do you want to do with this task?', 'Cancel', ['Mark completed', 'Delete forever'])
        .then(result => {
          console.log(result); // Logs the selected option for debugging.
          switch (result) {
            case 'Mark completed':
              this.dones.unshift(args.item); // Places the tapped active task at the top of the completed tasks.
              this.todos.splice(args.index, 1); // Removes the tapped active  task.
              break;
            case 'Delete forever':
              this.todos.splice(args.index, 1); // Removes the tapped active task.
              break;
            case 'Cancel' || undefined: // Dismisses the dialog.
              break;
          }
        })
    },
    onButtonTap() {
      console.log("New task added: " + this.textFieldValue + "."); // Logs the newly added task in the console for debugging.
      this.todos.unshift({
          name: this.textFieldValue
      }); // Adds tasks in the ToDo array. Newly added tasks are immediately shown on the screen.
      this.textFieldValue = ""; // Clears the text field so that users can start adding new tasks immediately.
    },
  },
  data() {
    return {
      dones: [],
      todos: [],
      textFieldValue: "",
    };
  },
}
</script>
<style scoped>
.home-panel {
  vertical-align: center;
  font-size: 20;
  margin: 15;
}
.description-label {
  margin-bottom: 15;
}
</style>
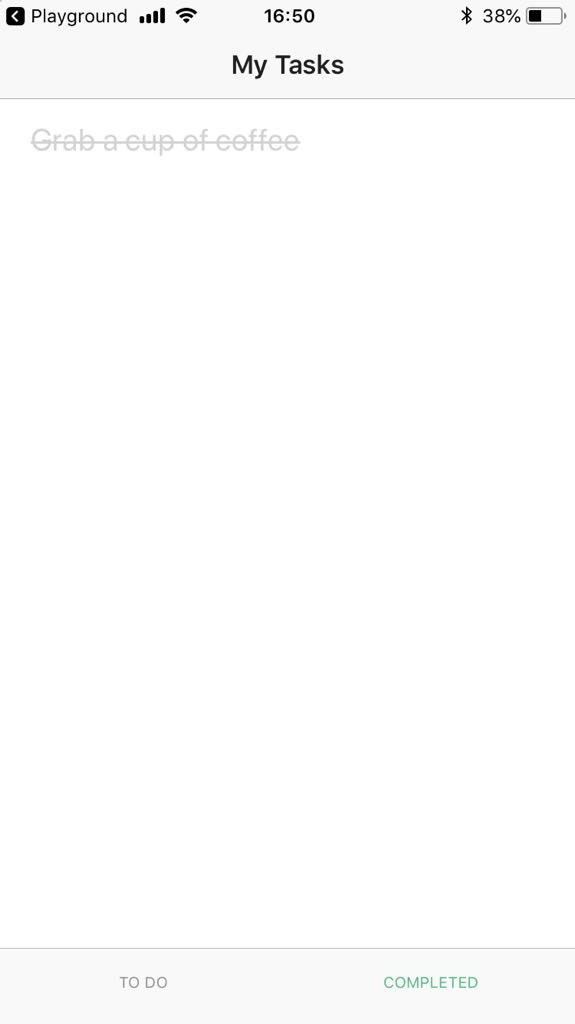
# 基本功能:从“已完成”选项卡中查看,返回活动任务和删除任务
# 科进展
以下是您的应用在本节开头和结尾处的显示方式。
| 标签2 - 已完成的任务 | 标签2 - 项目点击 | 标签1 - 活动任务 |
|---|---|---|
 |  |  |
# 一些NativeScript基础知识
此实施步骤不需要任何其他知识。
# 要求实施
对于第二个选项卡,创建并修改 onDoneTap 方法:
方法显示一个
action()对话框。方法在控制台中记录用户选择以进行调试。
根据用户选择,该方法将元素从
dones数组移动到todos数组,从数组中删除元素dones,或者取消对话框。使用splice()避免留下阵列中的孔,并unshift()确保最近完成的任务显示在顶部。onDoneTap: function(args) { action('What do you want to do with this task?', 'Cancel', ['Mark to do', 'Delete forever']) .then(result => { console.log(result); // Logs the selected option for debugging. switch (result) { case 'Mark to do': this.todos.unshift(args.item); // Places the tapped completed task at the top of the to do tasks. this.dones.splice(args.index,1); // Removes the tapped completed task. break; case 'Delete forever': this.dones.splice(args.index, 1); // Removes the tapped completed task. break; case 'Cancel' || undefined: // Dismisses the dialog break; } }) },
在此阶段结束时,您 <HelloWorld.vue> 应该类似于此示例:
<template>
<Page class="page">
<ActionBar title="My Tasks" class="action-bar" />
<TabView height="100%">
<TabViewItem title="To Do">
<!-- Positions an input field, a button, and the list of tasks in a vertical stack. -->
<StackLayout orientation="vertical" width="100%" height="100%">
<GridLayout columns="2*,*" rows="*" width="100%" height="25%">
<TextField col="0" row="0" v-model="textFieldValue" hint="Type new task..." editable="true" @returnPress="onButtonTap" />
<!-- Configures the text field and ensures that pressing Return on the keyboard produces the same result as tapping the button. -->
<Button col="1" row="0" text="Add task" @tap="onButtonTap" />
</GridLayout>
<ListView class="list-group" for="todo in todos" @itemTap="onItemTap" style="height:75%">
<v-template>
<Label :text="todo.name" class="list-group-item-heading" />
</v-template>
</ListView>
</StackLayout>
</TabViewItem>
<TabViewItem title="Completed">
<ListView class="list-group" for="done in dones" @itemTap="onDoneTap" style="height:75%">
<v-template>
<Label :text="done.name" class="list-group-item-heading" />
</v-template>
</ListView>
</TabViewItem>
</TabView>
</Page>
</template>
<script>
export default {
methods: {
onItemTap: function(args) {
action('What do you want to do with this task?', 'Cancel', ['Mark completed', 'Delete forever'])
.then(result => {
console.log(result); // Logs the selected option for debugging.
switch (result) {
case 'Mark completed':
this.dones.unshift(args.item); // Places the tapped active task at the top of the completed tasks.
this.todos.splice(args.index, 1); // Removes the tapped active task.
break;
case 'Delete forever':
this.todos.splice(args.index, 1); // Removes the tapped active task.
break;
case 'Cancel' || undefined: // Dismisses the dialog
break;
}
})
},
onDoneTap: function(args) {
  action('What do you want to do with this task?', 'Cancel', ['Mark to do', 'Delete forever'])
    .then(result => {
      console.log(result); // Logs the selected option for debugging.
      switch (result) {
        case 'Mark to do':
          this.todos.unshift(args.item); // Places the tapped completed task at the top of the to do tasks.
          this.dones.splice(args.index,1); // Removes the tapped completed task.
          break;
        case 'Delete forever':
          this.dones.splice(args.index, 1); // Removes the tapped completed task.
          break;
        case 'Cancel' || undefined: // Dismisses the dialog
          break;
      }
    })
},
onButtonTap() {
console.log("New task added: " + this.textFieldValue + "."); // Logs the newly added task in the console for debugging.
this.todos.unshift({
name: this.textFieldValue
}); // Adds tasks in the ToDo array. Newly added tasks are immediately shown on the screen.
this.textFieldValue = ""; // Clears the text field so that users can start adding new tasks immediately.
},
},
data() {
return {
dones: [],
todos: [],
textFieldValue: "",
};
},
}
</script>
<style scoped>
.home-panel {
vertical-align: center;
font-size: 20;
margin: 15;
}
.description-label {
margin-bottom: 15;
}
</style>
# 高级设计:样式输入字段和按钮
# 科进展
以下是您的应用在本节开头和结尾处的显示方式。
| 标签1 - 没有风格 | 标签1 - 样式 | 标签1 - 样式 |
|---|---|---|
|  |  |
# 一些NativeScript基础知识
使用NativeScript和Vue.js时,可以使用应用程序范围的CSS,作用域CSS或内联CSS来设置应用程序的样式。应用程序范围的CSS首先应用,并在 app.css 项目的根目录中处理。本教程不会探索应用程序范围的CSS。另请参见: Styling (opens new window).
Scoped CSS仅应用于当前组件,并 HelloWorld.vue 在 <style scoped> 块中处理。本教程几乎完全依赖于作用域CSS和内联CSS。另请参见: Scoped CSS (opens new window)。
使用类型选择器,您可以选择UI组件并对其应用样式。要选择类型,请使用代码中提供的组件名称。例如,要选择选项卡视图,请使用 TabView。
# 要求实施
# 设置输入字段的样式
在 HelloWorld.vue > <style scoped>,更改字体大小,颜色和边距<TextField>。
TextField {
  font-size: 20;
  color: #53ba82;
  margin-top: 10;
  margin-bottom: 10;
  margin-right: 5;
  margin-left: 20;
}
# 设置按钮的样式
在 <style scoped> 块中,为按钮创建样式。修改样式以创建带圆角的彩色按钮。
Button {
  font-size: 20;
  font-weight: bold;
  color: white;
  background-color: #53ba82;
  height: 40;
  margin-top: 10;
  margin-bottom: 10;
  margin-right: 10;
  margin-left: 10;
  border-radius: 20px;
}
# 高级设计:样式选项卡导航
# 科进展
以下是您的应用在本节开头和结尾处的显示方式。
| 标签 - 没有风格 | 标签样式 |
|---|---|
|  |
# 一些NativeScript基础知识
<TabView> 提供一些开箱即用的样式属性。您可以将文本转换到每个分页标题(textTransform),改变字体大小和颜色全球(tabTextFontSize, tabTextColor, selectedTabTextColor)。您还可以更改选项卡的背景颜色(tabBackgroundColor)。
# 要求实施
# 更改所选标签标题的颜色和字体大小
在 HelloWorld.vue,添加 selectedTabTextColor 和 tabTextFontSize 属性 <TabView>。
<TabView height="100%" selectedTabTextColor="#53ba82" tabTextFontSize="15" >
# 转换文字
将 textTransform 属性应用于单独的选项卡。您只能在 <TabViewItem> 关卡中使用此属性。
<TabViewItem title="To Do" textTransform="uppercase" >
<TabViewItem title="Completed" textTransform="uppercase">
# 高级设计:样式化的活动任务
以下是您的应用在本节开头和结尾处的显示方式。
| 活动任务 - 没有风格 | 活动任务 - 没有分隔符 | 活动任务 - 样式化的活动任务 |
|---|---|---|
|  |  |
# 一些NativeScript基础知识
<ListView> 并 <Label> 具有开箱即用的样式属性,可用于控制 <template> 块中的列表分隔符或文本换行等元素。要更改文本的字体样式,颜色和位置,需要在 <style scoped> 块中使用CSS 。
要实现特别针对活动任务文本的样式,可以 id 为 <Label> 元素设置。
# 要求实施
- 设置
id为<Label>代表活动任务,并启用文本换行。启用文本换行可确保在列表中正确显示较长的文本
<Label id="active-task" :text="todo.name" class="list-group-item-heading" />
- 添加
separatorColor属性并将其设置transparent为<ListView>显示活动任务的属性。这样,分隔符将不再出现在列表中。
<ListView class="list-group" for="todo in todos" @itemTap="onItemTap" style="height:75%" separatorColor="transparent" >
- 在
<style scoped>,为活动任务创建样式。设置字体大小,颜色和一些填充以在页面上定位文本。使用边距和填充,直到您得到适合您的结果。
#active-task {
  font-size: 20;
  font-weight: bold;
  color: #53ba82;
  margin-left: 20;
  padding-top: 5;
  padding-bottom: 10;
}
# 先进的设计:完成任务的风格
以下是您的应用在本节开头和结尾处的显示方式。
| 完成的任务 - 没有风格 | 完成的任务 - 风格 |
|---|---|
 |  |
# 一些NativeScript基础知识
本节应用了基本的NativeScript知识来自于 高级设计: 样式化活动任务.
# 要求实施
- 设置
id为<Label>代表已完成的任务,并启用文本换行。启用文本换行可确保在列表中正确显示较长的文本
<Label id="completed-task" :text="done.name" class="list-group-item-heading" />
- 添加
separatorColor属性,并将其设置transparent为<ListView>表示已完成任务的属性。这样,分隔符将不再出现在列表中。
<ListView id="completed-list" class="list-group" for="done in dones" @itemTap="onDoneTap" style="height:75%" separatorColor="transparent">
- 在
<style scoped>,为已完成的任务创建样式。设置字体大小,颜色,文本修饰和一些填充以在页面上定位文本。使用边距和填充,直到您得到适合您的结果。
#completed-task {
  font-size: 20;
  color: #d3d3d3;
  margin-left: 20;
  padding-top: 5;
  padding-bottom: 10;
  text-decoration: line-through;
}